
While browsing a recent issue of Make magazine, I found a list of CNC projects that caught my eye. In particular, the wood and aluminum bottle opener appeared to be ripe for customization with a bit of laser etching. The first step was to determine what art to use for the laser etching. With the approaching departure of a longtime colleague, I decided to go for a bit of robot art to make the opener into a personalized going away gift.
I wanted to turn the robot arm picture into a line art drawing to be laser etched onto the wood, however I wasn’t sure where to look for an artist that could do this kind of work. After a bit of Googling, I discovered a site called Fiverr where you can have various jobs done online for $5. In particular, I found a group of artists from the Philippines that would turn a photo into a line drawing for $5. Within a few hours of submitting a request, I had the line art drawing that I was looking for.
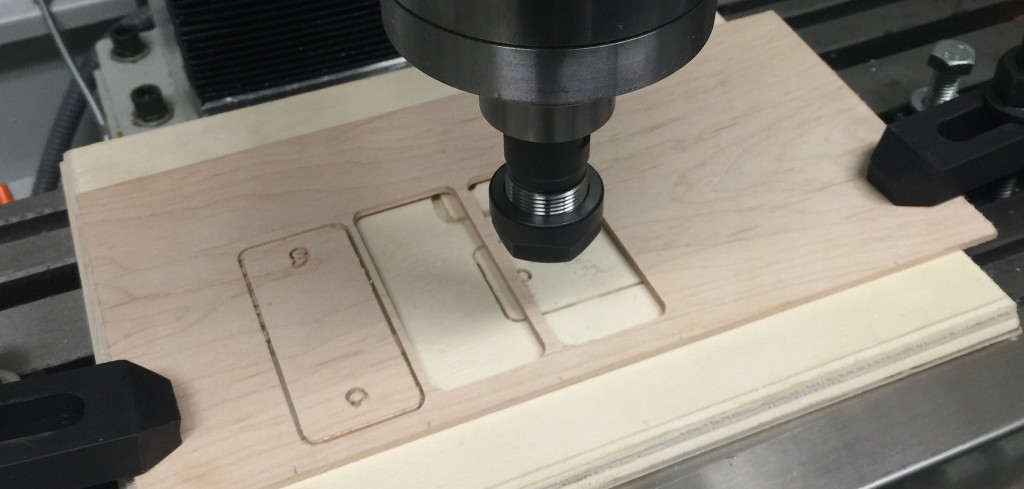
The next step was to order the materials needed from Inventables. Inventables made this process quite easy by having a project page which included an option to purchase all the necessary items. Once the materials arrived, it was time to cut the wood side panels out to prepare them for laser etching. The Inventables project page had the necessary SVG design files which could then be loaded into Easel to generate the g-code to drive the CNC machine. Easel is designed to drive the Inventables Shapeoko 2 CNC machine, but as luck would have it, the g-code that Easel exports for the Shapeoko 2 worked right out of the box on the Tormach CNC I was using once the file extension was changed to “.tap”. Note: if you’re planning to make your own parts from the Inventables SVG files, check that the holes for the chicago screws are properly aligned. In the version of files that I downloaded, the holes were offset and required adjustment in Inkscape before importing into Easel. As an extra step, I also used OpenSCAM to preview the g-code exported from Easel to verify the planned milling operations before loading the files onto the CNC machine.
 Cutting the wood panel on a test piece
With the wood pieces cut, I found a local laser engraving service (Sylvan’s Engraving), where the line art was engraved onto the wood pieces. If this process is repeated in the future, I’ll have the laser engraver cut the wood pieces out after engraving them all in one shot. Other than that, the laser engraving process worked quite well with the line art and took just less than 2 minutes per panel once the art was setup on the engraving computer.
In addition to the light wood, some dark wood pieces were engraved with an adhesive protective paper mask over the top. This mask allowed the engraved areas to be filled with an acrylic paint before the mask was removed.
Nice job Pierre. This was a really cool remake of the bottle opener project.
Glad you liked it, thanks to the crew at Inventables for the great design, parts and original write-up!
Hey Pierre,
I saw your remake on Inventables, and am looking for a little information. Was wondering if you might be able to help, as it looks like the designer removed their instructions for some reason? Looking at the Easel link provided in the project I see the settings for 1/8″ bit using the “On Path” option in the shape settings… Looking at this, it seems like using this Easel project out of the box, you’d end up with very narrow edges between the opening and outer sides in the aluminum… Like it would be fragile. I don’t have a bottle opener of that style to measure and reference, so I could be wrong. I often am… I wanted to get some input from someone else who’s made this. I see it’s been a while, but if you remember, could you tell me what kind of bit you used and whether you followed the center, inside or outside of the path for the overall shape as well as the opening? The designer posted something about a 1/32″ upcut bit, but that just seems like a good way to break tiny bits… maybe for the wood? I dunno… I just wanted to get some info from someone who knows a little more about the project, since there’s an awkward lack of information on the project. If you’ve gotta minute, I’d appreciate it! THANKS!
Hi Fred,
I logged into Inventables and it looks like my files are still there, so it appears I used a custom 1.6mm bit. If memory serves, I just used a small drill bit held with a collet. I don’t see any setting for inside/outside path, so I’m afraid I’m not much of a help on that front.
Pierre